Showing posts with label tutorial. Show all posts

29.5.11

New life for ugly baby headbands

My girlfriend Taeh calls those horrid little baby headbands "brain squeezers," as pictured below:


Lucy inherited loads of them, and bless her little bald head, just looks plain silly in them. So I did what any mommy would do...I fancied them up a bit!


Get the tutorial here.

13.1.11

DIY duct tape dress form

...starring me from 11 years ago!

What you will need:

1. Duct tape (several rolls). I used traditional old robot costume duct tape, but next time I make one I am going to order this stuff from Spoon Sisters. If you're going to be keeping the form around, it would be nice to have it be cute, after all.


2. Scissors
3. A friend


4. An old tee shirt


5. Vodka (optional but highly recommended)


Now let's begin.

Step one. Put on the t-shirt. This is the easy one.

Step two. Have your friend duct tape a fashionable blouse a la Terry Gilliam's Brazil over your t-shirt. It needs to go all the way down to your thighs.


***NOTE: If this is for a special occasion in which you will be wearing different unders than the usual (e.g. a corset), wear it to create the form. I wore a sexy corset under my wedding gown and my boobs were like 3/4 an inch higher than they were on the form. Result: BOOB PUCKERS on my wedding day. Fortunately, no one said anything, and you can't really tell in the pictures, but since we had an out-of-town wedding, there was nothing to be done for it but more of step three.


Wrap all the way up, bringing the tape across boobage diagonally as needed to accommodate your lusciousness. Keep going!


Step three. Drink vodka.

Step four. This is where you really have to trust your homegirl. Have her cut up the back of the taped-up shirt, carefully.


I can see why he married me from this angle. Mmmm, curvy.


Step five. Tape that baby back together exactly where you cut it (but only not on your body this time).

Step six. Cover the holes with cardboard or paper or whatever you have to close them off.

Step seven. More vodka.

Step eight. Stuff that baby with some kind of polyester fill and close off the bottom with cardboard and you guessed it...more tape!

Step nine. Congratulations! You are all ready to make that gothic dress for the Cure tribute show.
Have a vodka to celebrate!

10.8.10

Ribbon necklaces, floral headband and sequin applique hat, oh my!

Cuteness reigned supreme today at the Collinsville Splash Pad, where super hot mama Jessica was rocking the DIY even in the oppressive red dirt heat.  Check out her fabulous sequin applique hat:


I also had fun showing off this adorable headband. I don't have a tutorial for it...I bought it. But I bet it would be super easy to make.  If you know of a tutorial, hook me up with the link!


But here's my favorite part, a goodie for you!  Really, this goodie is for Jessica, since she commented on how much she loved my necklaces and thought she'd like to go home and try them...

I made these little necklaces on my lunch break the other day.  I still have tons of ribbon left over from that amazing garage sale of dreams where I found it amidst the clutter and chaos of broken toys and furniture and dirty-faced children dancing around in twice-handed down clothes as some Staind-clones blasted from a grease-slicked cassette-radio atop a stack of cardboard boxes.  We were driving by slowly when among the washed-out monochromes of a north side Tulsa summer junk sale, something caught my eye...vivid reds and purples peeked out of a low-lying box like pansies blooming in a landfill.  "Stop the car!" I'd squealed, and manically, almost immediately leapt across the unkind ground, bare feet gliding across broken glass and broken tar, and had with lightning speed shoved my hands into a box loaded with vintage notions and bias tape and ribbons and breathtaking lace...the overheated sellers had told me, "Three bucks.  Fill a bag."  I had to stop myself from having a scoronary.  Breathe.  

When they realized I had every intention of filling the bag to the level of stuffed, they tried to stop me, caught the glimmer that something was wrong with their valuing of the old shop-blackened Levi's at five bucks and what I had for such a price, but I smiled.  The deal was done.  These people were hagglers, just shy of nomads. No need to restate the obvious.  

I grabbed me treasure and jetted.  Arrrrrrrrghhh.

Anyway, I have tons of the stuff, so I made these little cuties inspired by this May Arts post:


Here is another pic.


They were soooo easy to make and took hardly any time.  Love them?  I do!

8.8.10

Table Collage Revamp for Roo

We love our neighborhood.  Our neighbors are amazing, lovely people and constantly doing nice things for each other and looking out for one another.  


Case in point, during the terrible ice storm of 2008, I was pregnant and giant and slipped on the ice.  Although our street was an ice-carved ghost town, three women rushed from various homes to my aid within seconds.  It was astonishing.


One of those women was our next-door neighbor Mary, whose son is former city councilor Eric Gomez, and they are both all around great people. Recently, Mary loaned us a little kid table her grandchildren had outgrown, an indefinite loan as she might want it back if she has any munchkin additions to the family.  Arthur loves it: it's just his size and he loves eating meals there, drawing, even reading the newspaper (we're not sure why or how that works either but he enjoys it nonetheless).  

The table is great, but the kindergarten classroom primary colors, its taped and battered reminders that it's been well-loved, and Arthur's own artistic additions to it were starting to grate on me, as the toddler hub has become a staple in the great room.  If the table was to stay, something must change. 

rough looking table


And then, as I was trying desperately to arrange the back room of the house, which has since Arthur's birth become our communal craft/sewing/music room (literally my violin hangs on the wall above my Singer and next to a giant Kustom amp), the Mod Podge spoke to me.


mod podge


 I popped over to Mod Podge Rocks to see if I could find something similar to what I was envisioning, where I found terrific inspiration from cuteness diva Kristi.  A short phone call to my girlfriend Eva, a couple of Cuba libres and a dozen and a half stories about our adventures in the crazy Jamestown house in the 90s later, we had this in the works:


table podge


We pillaged my wrapping paper, scrapbook paper, paint samples (Arthur picks them out and "buys" them when we go shopping at the home store...he loves it and the checkout clerks are happy to "scan" them...I've been hanging onto them like any good Level I hoarder waiting for the right change to use them) and vintage greeting card collection for colors and patterns and even characters we loved and then mod podged them to the table.  Because the surface of the table is a bit puffy, they kept wanting to peel up, wrinkle, and bubble, so it was something of a challenge, but we were hardcore.


When we finished the job, we attacked our table with stickers and other clip art.  We even hit it with a few inked-up stamps.  After Eva left, I coated the whole thing with glitter podge.


awesomest table ever


Although we plan to coat it with the world's thickest layer of polyurethane, the final project looks like this up close:


more table detail


table detail

I will probably finish the chairs later this week when I can recruit more Eva.  The best part is that it took about an evening and was super extra fun to have the kids help while we sat around chatting it up.

If you try this project, be sure to poly coat it, and post a link to pics for me!!!

Find lots of cool mod podge projects on Mod Podge Rocks.

24.5.10

Little Dresses for Africa and Valerie from My Own Crafty Wonderland

Hi everyone!  I have been slacking on blogging lately because I have been working long days on the most amazing project up at the community college and our first deadline is about to steamroll us...very soon our Online Writing Lab (OWL) project will be fully armed and operational!  I don't have time to post a proper blog, but I would like to give some massive super duper mad props to my girl Valerie over at My Own Crafty Wonderland!  I met this amazing little lady four or so years ago through the wonderful world of scooters and she is definitely one of the coolest chicks I know.  She is cute as a button, extra crafty, and big-hearted.

For Valerie's birthday this year, she wanted something very special.  After reading about her request--she wanted her friends to bring pillowcases and make them into dresses for little girls in Malawi via an organization called Little Dresses for Africa--I really wanted to help out.  I put out a request and TCC represented...I love that school...amazing people and I'm so lucky to be part of the team over there with terrific people like Little Ms. Librarian.

My girlfriends Fallon and Cassie joined me and between the three of us we managed about 34 pillowcases!  I brought some vintage lace and rick rack and several of those little cute fabric flower doodads in case anyone wanted to put them on their dresses as embellishment--and to my surprise almost every one of them was used! To be honest, I somewhat notoriously (in my family, at least) failed home ec in middle school...I had done all right with the orange juliuses and sugar cookies, and I still wear my simple apron to this day (it was hemming and attaching ribbons, for pete's sake), but my poor little Pentecostal Prom Princess jumper never saw the light of day, instead ending in a crumpled mess of lovely pastel fabric I'd so adoringly chosen, bemoaning to the world my quiet failure to reconcile the academic and domestic...so I wasn't sure if my flowers would be as cool to anyone else as they are to me.  Needless to say, I was happy to see that other people enjoyed them and that they looked very cute on the little dresses.  Take that, Ms. Murphy.  Stick that in your hot air balloon hat.

Uh, where was I?

Oh, here you go!  Fallon took these wonderful photos...my camera died on the first shot.  Too bad I didn't listen to hubs when he warned me not to buy discount batteries!  I couldn't find the rechargeables and I was in a hurry...but I learned my lesson!


Here I am checking out the little red one I "made"--does it count as made if someone else did the sewing?  On that note, major extra mad props to those hardcore mamas who kept up with the sewing.  Go girl power!

It's hard to tell in this pic, but that little dress was red gingham with hearts, and the little bow is white with red hearts.  It was extra rad.  On the dress directly to my right, you can see one of my little flowers.


Left to right: Fallon, Cassie, me, Valerie.  What a great group of girls!  I had such a terrific time.


Aren't these dresses just beautiful?  They will grow with their wearers and as Doug, Valerie's hubs, pointed out, if they look this cute on the line, just imagine how sweet they will be with little precious sweetie pie girlies in them!


The one on the right here is mine.  You can't tell in this photo, but it has two little pink fabric flowers on it.

What a great day!  Thank you, Valerie!

10.5.10

Cute hair doodads for gifting (tutorial)

Back two years ago when we all at once had a new baby and felt the sting of what the British call "redundancy" not once but twice, Yorktown Owens started getting really creative about gift giving.  This morning, I am sharing with you one of our favorite DIYs, first inspired by some super cutie stuff I liked on etsy and inspired by some of the many felt flower tutorials we've seen on One Pretty Thing.

They're super easy to make, and everyone loves them.  We use repurposed fabric for ours.  Here's our version.


You will need these supplies:


*Some elastic headbands that come several to a pack from someplace cheap where they're probably mass-produced in a sweatshop (unless you can find a better way to procure them).

*A hot glue gun.  Don't buy a cheap one.  We did this and mine epically exploded.  It was terrifying and hilarious all at once.

*Templates for cutting fabric.  I generally just use cookie cutters like the one above and other round or flower-shaped objects.

*A white crayon or something similar to trace on the fabric.  I use some superskinny oil pastels I have or cheap white eyeliner.  Probably there is a better way to do this.  I sucked at home ec, so I wouldn't know.

*Fiskars, preferably cute pink or purple ones.  Mine are county orange, like my soul.

*Needle and thread.  And probably a thimble.

*Rick-rack, ribbon, lace, cute buttons, other notions.  I pick them up at garage sales and repurpose old clothes for them.

*Wine.  Preferably a malbec but for summer, a gewurztraminer will work.

*A girlfriend or two to talk to while you work and give them to when finished.  I had Tina.  Tina is precious.

*Some felt and other fabric.  I like to use a mix of lace, felt and miscellaneous old clothes I have taken apart because they no longer worked for one reason or another but I just love love love the fabric.  

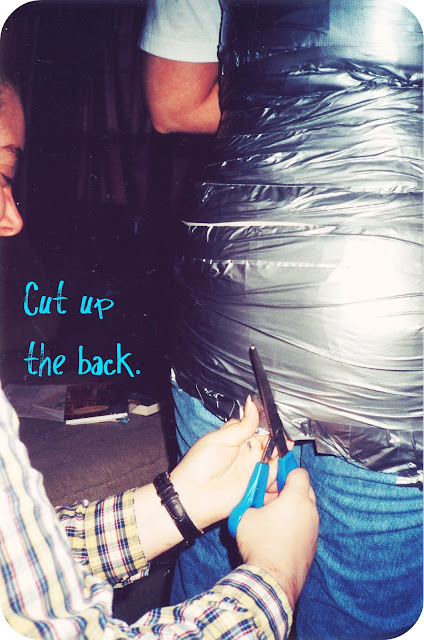
Speaking of repurposing fabrics, I was super thrilled to see my extra fabulous mother-in-law wearing a rosette she'd made from two robot costumes her boys had worn when they were little, one gold and one silver.  This is a woman who owns glam.  She epitomizes style and grace. I have to make one of these soon:


Anyway, back to the hair doodad project.  It's just so easy.  You trace and cut out a ton of different sized fabric pieces.  I catch up on my favorite shows on Hulu while I'm doing this.


Then you have some of these.  I like just making a ton so you can spread them out and decide which you like together.  It's kind of fun...I have a whole basket of them.

Then you stack them up to your pleasure, like so.


You can sew through them with a button on top, as I did here:


Or just sew through them and make a little "X" on top; that's really cute if you use contrasting thread.

At this point, you can hot glue it to some old plain hair clip you have lying around like so:


(this is Tina rocking the one I made for her)

Or you can cut a length of grosgrain, lace, etc., kind of measure around your head with it, and then cut one of those elastic headbands apart so you can close the fabric up with it.  This makes your headband stretchy.


Here I used some vintage lace I picked up at a garage sale, where a very nice lady let me fill a whole grocery bag with vintage notions for like three bucks (I now own shades of rick rack I didn't know existed, and lord knows I love rick rack).  It was a special day for me!


As a I child of the 70s-early 80s, I was destined to love rick rack.


In the picture above, I just used a little bit there.  

Next, you glue your flower to the band.  I put mine kind of on the side.  I use another piece of felt to secure it on the bottom side, like so:


Notice here how I actually made this one from rick rack glued to bias tape.

There are tons of other variations you all can come up with on this, I am certain.  Just be careful with that hot glue; it can be tricky business for the craft-challenged like me!

Anyway, it dries in a snap and then you're ready for the ball.


There you have it!  Have fun.  Peace, everybody.

19.4.10

Faux Dreads and Messy Buns

Many people have asked about my little twisties, AKA "faux dreads."

I am posting a link to the original tutorial from adorable Love Maegan as well as my pics.  These pictures are from about four days in, a miraculous feat for me since I am a daily hair washer.  I only took them out when I went to my amazing stylist Corie Butler.


People also ask me often about how I create the messy bun ponies I so often wear (two low ponies are a good solution for those of you with thick, heavy hair like mine).  Basically, I pull my hair into two low (or high, depending on how funky my mood is...low seems more appropriate for working at the school) ponies, banding them tightly.  I take a second elastic on each one in turn and pull the hair up to the elastic in a kind of loop, putting a second band around each pony and leaving just a little hair out so it's nice and messy.  So that it will be a nice, solid, hold and still very messy, I then grab the hair close to the original pony band, the underneath part, and pull it as if I am tightening a ponytail.  Then I have this:


Or if you do just a single messy pony it looks like this:


Here is another adorable tute with some added detail from The Wright Hair.  Enjoy!

(Did anyone notice I am holding a different baby in one of those pics?  The boy in the hospital pic is my little precious nephew Nono, as the bot calls him. He is lovely and his bright blue eyes will make all the girls cry someday!).